Favorite White Cake Recipe

This is my favorite white cake recipe.

Sally McKenney
Cream the Butter: To achieve a good rise, properly cream the butter and sugar together. We have a crutch of baking powder and soda, but the recipe begins with that very first and imperative step: beating the butter and sugar together until creamy.

Egg Whites: Use ONLY egg whites. No yolks. Not only will using only egg whites give us a pristine white cake, it will ensure that the crumb is not weighed down by the fat in egg yolks. Think about it: lighter confections such as marshmallows and angel food cakes only require egg whites. Same story here.

Sour Cream: Sour cream is the cake’s security blanket; it keeps everything moist.

Cake Flour: Cake flour is almost 30x finer than all-purpose flour. Using it is a surefire way to achieve a delicate and delicious texture. It’s sold in the baking aisle and you can use the rest of the box in any of these recipes that use cake flour.

Room Temperature: Make sure all of your ingredients are at room temperature. When ingredients are the same temperature, they bind together more readily than if you had some cold and some warmer ingredients. Colder ingredients, especially egg whites, will produce a thicker batter and, since it’s cold, will take longer to bake. This changes everything..

Servings: 10

Ingredients

For the cake

  • 2 1⁄2 cups cake flour
  • 2 tsp baking powder
  • 1⁄2 tsp baking soda
  • 1 tsp salt
  • 3⁄4 cup unsalted butter, softened to room temperature (1 1⁄2 sticks)
  • 1 3⁄4 cup granulated sugar
  • 5 large egg whites at room temperature
  • 1⁄2 cup sour cream at room temperature
  • 1 tbsp pure vanilla extract (yes, tablespoon!)
  • 1 cup whole milk at room temperature

For the frosting

  • 1 1⁄4 cups (2.5 sticks; 287g) unsalted butter, softened to room temperature
  • 5 cups (600g) confectioners’ sugar
  • 1⁄3 cup (80ml) heavy cream
  • 2 teaspoons pure vanilla extract (or use clear imitation vanilla extract for stark white frosting)
  • 1⁄8 teaspoon salt

Equipment

  • 2 9 inch cake pans grease and lightly flour pans. If want to use 9×13 pan, bake 40 minutes

Instructions

For the cake

  1. Preheat the oven to 350°F (177°C). Grease and lightly flour two 9-inch cake pans.
  2. Whisk the cake flour, baking powder, baking soda, and salt together. Set aside.
  3. Using a handheld or stand mixer fitted with a whisk attachment, beat the butter on high speed until smooth and creamy — about 1 minute.
  4. Add the sugar and beat on high speed for 2 minutes until creamed together. Scrape down the sides and up the bottom of the bowl with a rubber spatula as needed.
  5. Add the egg whites. Beat on high speed until combined, about 2 minutes.
  6. Then beat in the sour cream and vanilla extract. Scrape down the sides and up the bottom of the bowl as needed.
  7. With the mixer on low speed, add the dry ingredients until just incorporated.
  8. With the mixer still running on low, slowly pour in the milk until combined. Do not overmix. You may need to whisk it all by hand to make sure there are no lumps at the bottom of the bowl. The batter will be slightly thick.
  9. Pour batter evenly into cake pans. Bake for around 24-25 minutes or until the cakes are baked through. To test for doneness, insert a toothpick into the center of the cake. If it comes out clean, it is done. Allow cakes to cool completely in the pans set on a wire rack. The cakes must be completely cool before frosting and assembling.

For the frosting

  1. In a large bowl using a hand-held mixer or stand mixer fitted with a whisk or paddle attachment, beat the butter on medium speed until creamy — about 2 minutes.
  2. Add confectioners’ sugar, cream, vanilla extract, and salt with the mixer running on low. Increase to high speed and beat for 3 full minutes.
  3. Add more confectioners’ sugar if frosting is too thin, more cream if frosting is too thick, or a pinch more of salt if frosting is way too sweet.

Notes

  • The frosting recipe makes enough for a thick layer in the middle of a two-layer cake.

Link: Bacon Fat Tortillas

I have been using this to make tortillas ALL THE TIME. Substituting coconut oil for bacon fat works well too. I usually let these rest a little bit after I roll them into balls too.

All credit goes to Mexican Please.

PS: Make sure to strain and store your bacon grease properly.

After all of my skepticism, these were some incredibly satisfying flour tortillas and they were easily on the same level as the ones made with home-rendered lard. Thin, light deliciousness without any overwhelming bacon flavor. Actually there wasn’t much bacon flavor at all, just a hint of that bacon savoriness in the background.

Ingredients

  • 3 cups unbleached all-purpose flour
  • 1⁄4 cup bacon fat
  • 1 1⁄2 teaspoons salt
  • 1 cup warm water

Instructions

  1. In a mixing bowl, add 1 1⁄2 teaspoons of salt to 3 cups of all-purpose flour and combine well. Add 1⁄4 cup bacon fat to the flour and use your fingers to crumble the fat into the flour mixture. Add 1 cup warm water and stir as much as you can with a spoon or spatula, then dump the mixture onto a flat surface and knead into a cohesive ball using your hands. Let the dough rest for 30-60 minutes.
  2. Tear the dough into golfball-sized chunks, rolling between your hands to shape them into smooth balls.
  3. Use a rolling pin to roll the dough balls out to approximately 5-6 inches in diameter. I usually roll them out super thin to the point of being transparent.
  4. Preheat a dry skillet or comal. The preferred setting on my stove is halfway between medium and medium-high heat. Add one of the rolled-out tortillas and cook each side for 45-60 seconds or until light brown spots are forming.
  5. As one tortilla cooks, roll out the next to expedite the process.
  6. Serve immediately and store leftovers in the fridge. Alternatively, you can only make as many as you need and store the remaining dough in the fridge where it will keep for a few days.

Chocolate Orange Cake

This is the BEST chocolate orange cake ever. It’s moist, decadent, and bursting with chocolate and natural orange flavor in the cake and in the chocolate orange buttercream. It’s so easy to make too!

Prep Time 25+ mins Bake 22 mins

Ingredients

For the cake

  • 1 1⁄2 cup all-purpose flour
  • 1⁄2 teaspoon salt
  • 1 1⁄2 teaspoon baking soda
  • 1⁄2 teaspoon baking powder
  • 3⁄4 cup unsweetened Dutch processed cocoa powder
  • 1⁄2 cup canola oil (or other neutral oil)
  • 1 1⁄4 cup granulated sugar
  • 2 tablespoon orange zest
  • 1 teaspoon vanilla extract
  • 2 eggs
  • 1⁄4 cup orange juice
  • 1⁄2 cup milk (regular or dairy free)
  • 3⁄4 cup hot water

For the buttercream

  • 3⁄4 cup butter, softened (regular or vegan)
  • 1⁄4 cup + 2 tablespoon vegetable shortening (or butter if not dairy free, see notes)
  • 1 1⁄2 tablespoon orange zest (or use King Arthur orange oil)
  • 3⁄4 teaspoon vanilla extract
  • 3⁄4 cup unsweetened cocoa powder
  • 2 1⁄2 – 2 3⁄4 cup powdered sugar (icing sugar / confectioner’s sugar; see notes)
  • 1⁄2 – 1 1⁄2 tablespoon milk, if needed (regular or dairy free)

Instructions

  • Preheat the oven to 350°F and prepare two 8-inch round cake pans. Spray the inside with cooking spray, then cut round pieces of parchment paper so that they fit in the bottom of each pan (do not skip the parchment paper lining!). I used 9-inch pans; just a little thinner, still took as long to bake.
  • Whisk flour, cocoa powder, sugar, salt, baking powder, baking soda together in a large bowl.
  • Add in the eggs, vanilla, oil, orange zest, orange juice, and milk. Pour in the hot water and mix until smooth.
  • Divide the batter evenly between the two cake pans and bake on the middle rack of the oven for 20-26 minutes or until a toothpick inserted in the middle of the cakes comes out clean.
  • Let the cakes cool in the pans, then run a butter knife around the outside of the cake to loosen it from the pan and flip upside down onto a cooling rack.
  • Make the buttercream. In the bowl of a standing mixer or handheld mixer, beat butter and shortening together until combined. Skip if using all butter. Beat in the cocoa powder until smooth.
  • Add in the orange zest, then add the icing sugar 1⁄4 cup at a time until desired consistency is reached. If the buttercream is too thick, add in milk 1 tablespoon at a time to thin it out. If it’s too thin, add in more confectioner’s sugar 1⁄4 cup at a time.
  • Once the cakes have cooled completely, frost them and enjoy!

Seared Seitan with Tarragon Pan Sauce

The best vegetarian gravy we’ve found, this will be at every Thanksgiving from here on out.

Tarragon adds a feeling of elegance and rich flavor to pan sauce that’s made with seitan. Serve it with green beans and mashed potatoes for a classic, comforting meal.

Ingredients

For the seitan

  • 16 oz seitan (cubed; sub firm tofu)
  • 2 cloves shallots (diced)
  • 2 tsp tarragon (finely chopped, fresh)
  • 1 tbsp cooking oil
  • 2 tbsp butter
  • 1 tbsp apple cider vinegar
  • 2 tsp mustard
  • 2 tbsp flour
  • 1 1⁄2 cups stock

For the green beans

  • 1 lb green beans (trimmed)
  • 1 tbsp olive oil
  • 2 tsp mustard
  • 1⁄2 tsp balsamic vinegar

For the mashed potatoes

  • 1 lb russet potatoes (cubed)
  • 2 tbsp Greek yogurt (sub sour cream)
  • 2 tbsp butter

Instructions

Prep

  1. Seitan / Shallots / Green beans – if prepping right before cooking, get oven heating first. Store separately. (Can be done up to 5 days ahead.)
  2. Tarragon — finely chop tarragon. (Can be done up to 1 day ahead.)
  3. Potatoes — peel and cube potatoes.

Make

  1. Heat oven to 425°F / 218°C.
  2. Place potatoes in a saucepan and cover with cold water and some salt. Cover and bring to a boil. Remove lid from potatoes and simmer until potatoes can be easily pierced with a fork, 12 to 15 minutes.
  3. Meanwhile, toss green beans with olive oil, mustard (portion for green beans), and balsamic vinegar. Season with salt and pepper and spread out on a sheet pan. Roast until tender, shaking the pan halfway through cooking, 18 to 20 minutes.
  4. Once green beans are roasting, heat a large skillet with cooking oil over medium heat. Add seitan and sear on all sides until golden, 6 to 8 minutes.
  5. Add butter (portion for seitan) to pan with seitan. When butter melts, add shallots and tarragon. Saute until shallots are soft, 2 to 3 minutes. Stir in apple cider vinegar and mustard (portion for seitan).
  6. Add flour to seitan and stir until no dry spots remain. Slowly pour in stock while whisking. Simmer sauce until thickened, 2 to 3 minutes. Season with salt and pepper. Set aside, covered, to keep warm.
  7. Drain potatoes and let sit in a colander for ~5 minutes to allow the steam to escape (this creates creamier potatoes vs. liquidy potatoes).
  8. Use a masher to mash potatoes with sour cream, butter (portion for potatoes), and some salt.
  9. Serve seitan and sauce over mashed potatoes. Enjoy green beans on the side.

Notes

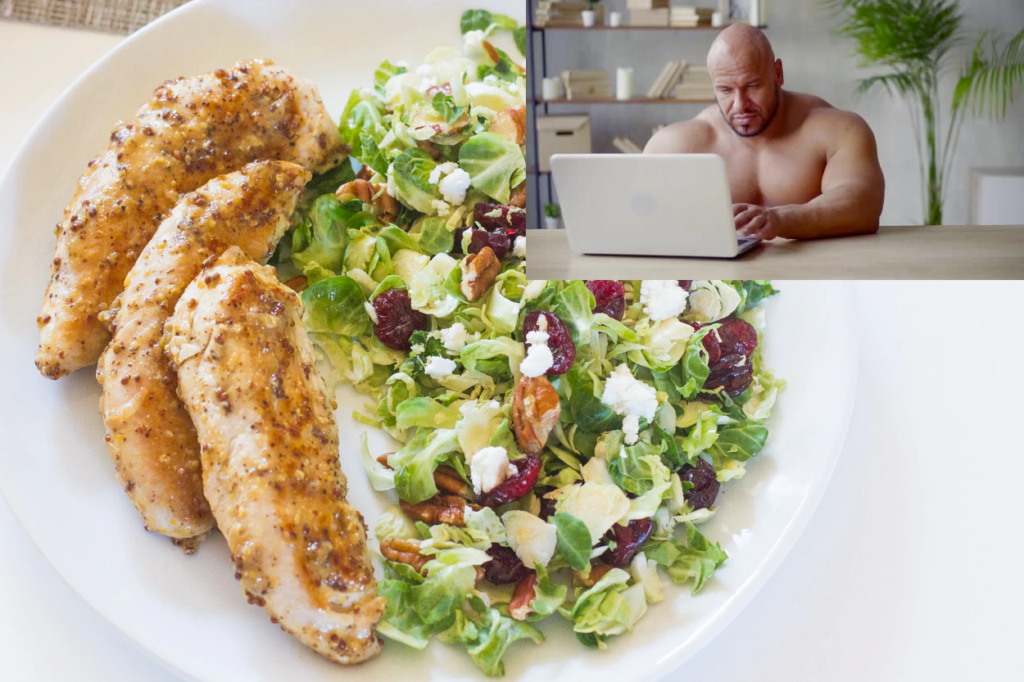
Shredded Brussel’s sprouts salad

This is a sprouts salad that my friend Brussel (the weightlifter) taught me. I usually have this with chicken tendies, which I’ve included as well.

Chicken tendies seared and tossed with mustard and tarragon pan sauce, aren’t you fancy? Shredding brussels sprouts to serve in a salad on the side gives them flavor and crunch.

Ingredients

For the salad

  • 1⁄2 cup pecans (chopped)
  • 1 lb brussels sprouts (shredded)
  • 1 tsp mustard (use Dijon if you want texture, but just know that “fancy” mustard is all bs — make it yourself and you’ll know why)
  • 1 tsp wine vinegar (red or white wine)
  • 1 tsp honey
  • 3 tbsp olive oil (avoid all European OO, it’s unregulated crap; California / Australian is the best)
  • 1⁄2 cup cranberries, dried
  • 4 oz goat cheese

For the chicken

  • 2 cloves shallots (diced)
  • 2 tsp tarragon (chopped)
  • 1 lb chicken breasts (cut into big strips, like tenders)
  • 1 tbsp cooking oil
  • 2 tsp wine vinegar (red or white)
  • 1⁄3 cup stock (I use Better Than Bouillon and it’s great)
  • 1 tbsp mustard (again, whatever mustard you want; I go with generic because the ingredients are pure & simple)
  • 2 tsp honey

Instructions

Prep

  1. Pecans / Shallots / Tarragon — prep as directed. Store separately. You can leave the pecans raw for the salad, or if you prefer, toast them in a dry skillet over medium heat, stirring frequently until fragrant, ~4 minutes. (Can be done up to 5 days ahead.)
  2. Brussels sprouts — put the slicing disk in a food processor and shred sprouts. If using the Breville Sous Chef, turn the slicer to just under 2. We’ve had it thinner as well; it makes it more voluminous which you may prefer, but make extra dressing to compensate. (Can be done up to 3 days ahead.)
  3. Chicken breasts — slice into thick strips. Season with salt and pepper and tenderize with a fork. (Can be done up to 1 day ahead.)

Make

  1. Combine mustard, vinegar, honey (the portions for the sprouts), and olive oil. Season with salt and pepper. Toss with brussels sprouts, cranberries, and pecans. Crumble goat cheese over top.
  2. Heat a skillet or saute pan over medium-high. Add cooking oil. When oil begins to shimmer, add chicken and saute until golden brown and cooked through, 2 to 3 minutes on each side. Transfer to a plate and return pan to heat. Add shallots and vinegar (portion for the chicken) and saute, scraping up any bits on the bottom of the pan, until shallots become tender, ~3 minutes. Add stock, tarragon, mustard, and honey (the portions for the chicken) and whisk. Simmer until sauce thickens, ~2 minutes. Add chicken back into the skillet and stir to coat in sauce.
  3. Serve chicken with extra pan sauce over top and salad on the side. Enjoy!

Notes

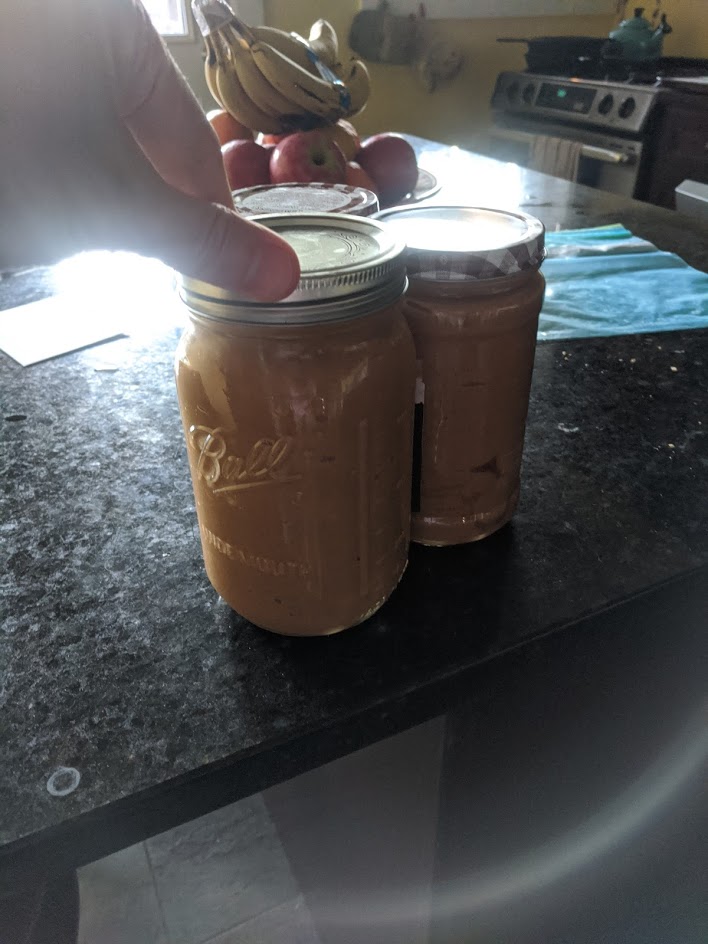
Grump Pup’s Peanut Butts (Peanut Butter)

An old recipe I’ve made off and on since 2010, and now that peanut butter is sold out everywhere during the pandemic I’ve been making this regularly. Amelia gave tasting notes and I kept modifying the recipe until we settled on this one: not as sweet as Jiff and not so bland as natural, with a little cinnamon kick.

Ingredients

  • 2 lbs peanuts (roasted, unsalted)
  • 3⁄4 tsp salt (or more to taste)
  • 2 tbsp honey
  • 1 1⁄2 tsp cinnamon (ground)
  • 4 tbsp peanut oil (less if you like your pb thick)

Instructions

Blender

  1. Put it all in a blender. Blend it up, scraping the sides with a spatula to get it going. Don’t give up, and let the motor rest if it gets hot. It will eventually blend like a thick smoothie, and appear thin & oily until it cools.

Food processor

  1. Now that I have a food processor it’s so easy! Just turn it on and let it go until it’s your desired smoothness — I prefer a fast moving tornado (about 2 to 3 minutes). No need to pulse, no need to let it cool.

Buttermilk pie crust

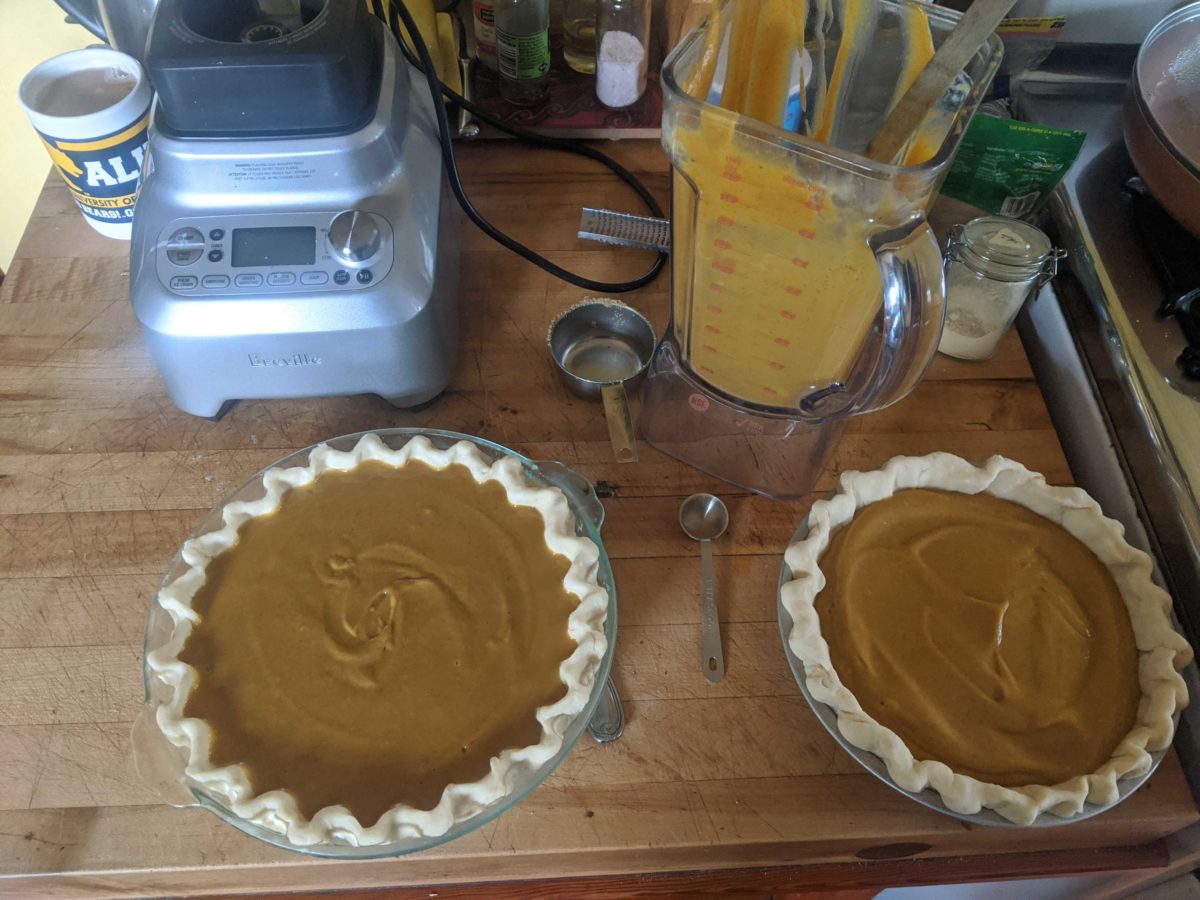
I didn’t invent this recipe myself, but I’m including it here because it’s so good: it makes an all-butter, fairly flaky, and yet still tender crust.

Ingredients

  • 2.5 cups all-purpose flour
  • 2 Tbs granulated sugar
  • 3⁄4 tsp salt
  • 1 cup unsalted butter (cut into tiny cubes and kept cold)
  • 1⁄2 cup buttermilk (a few more Tbs if dough is too dry)

Instructions

  1. In a medium/large bowl, combine flour, sugar, and salt.
  2. Add cold butter cubes and press into the flour with your fingers (or food processor or fork) until flour looks like it has little butter pebbles in it.
  3. Make a well in the flour mixture. Pour in buttermilk. Stir with fork until dough starts to come together.
  4. If your bowl is big enough, just keep working in the bowl, otherwise dump onto a floured table. Knead the dough just until the parts stick together and dough looks shaggy. Don’t over-work your dough or you’ll just make it tough.
  5. Divide into two equal parts. Shape into disks.
  6. Wrap each disk in parchment paper, spare plastic, or similar. Refrigerate 1 hour or more.
  7. Roll out as you would any pie crust.

Notes

  • Bake your pies in the bottom part of your oven to help cook the bottom crust underneath the pie, especially if you don’t blind-bake it.

Chocolate chip cookies

This recipe is from the New York Times. It is perfect and simply cannot be improved. Yes, waiting 24 – 72 hours between making cookie dough and baking them seems absurd, but I promise you: these cookies are worth the wait.

Ingredients

  • 8 1⁄2 oz cake flour
  • 8 1⁄2 oz bread flour (you can substitute all-purpose)
  • 1 1⁄4 tsp baking soda
  • 1 1⁄2 tsp baking powder
  • 1 1⁄2 tsp coarse salt
  • 1 1⁄4 cup unsalted butter (softened)
  • 10 oz light brown sugar
  • 8 oz granulated sugar
  • 2 large eggs
  • 2 tsp vanilla extract
  • 1 1⁄4 lbs 60% cacao chocolate chips/discs
  • sea salt (to sprinkle)

Instructions

  1. Take the unsalted butter out of the fridge. Let it soften.
  2. Sift flours, baking soda, baking powder, and salt into a bowl. Set aside.
  3. Using a mixer fitted with paddle attachment, cream butter and sugars together until very light, about 5 minutes. Add eggs, one at a time, mixing well after each addition. Stir in the vanilla. Reduce speed to low, add dry ingredients and mix until just combined, 5 to 10 seconds. Drop chocolate pieces in and incorporate them without breaking them. I usually fold them in with a spatula instead of the mixer.
  4. Scoop dough into 3 1⁄2-ounce mounds (the size of generous golf balls) and set back into your bowl. Cover the bowl with plastic/beeswax wrap and refrigerate for 24 – 36 hours. Dough may be used in batches, and can be refrigerated for up to 72 hours.
  5. Now that you’ve waited at least 24 hours and are absolutely desperate to eat these damn cookies, preheat the oven to 350 degrees. Line baking sheets with parchment paper or nonstick baking mats. Transfer your cookie dough to the baking sheets, making sure to leave ~2 inches in between them so they can spread.
  6. Sprinkle each cookie dough ball lightly with sea salt (if the salt doesn’t stick, spring the cookies lightly with water and then add the salt flakes) and bake until golden brown but still soft, 18 – 20 minutes.
  7. Transfer sheet to a wire rack for 10 minutes, then slip cookies directly onto the rack to cool a bit more. Eat with abandon. Thank the gods for delivering this manna from heaven.

Notes

  • I usually bake the cookie dough in a few batches, so I have fresh cookies for a few days in a row. Just keep the bowl tightly covered with plastic/beeswax wrap so the dough doesn’t dry out in the fridge. You can also freeze these cookies; they’ll just need a bit more time in the oven.

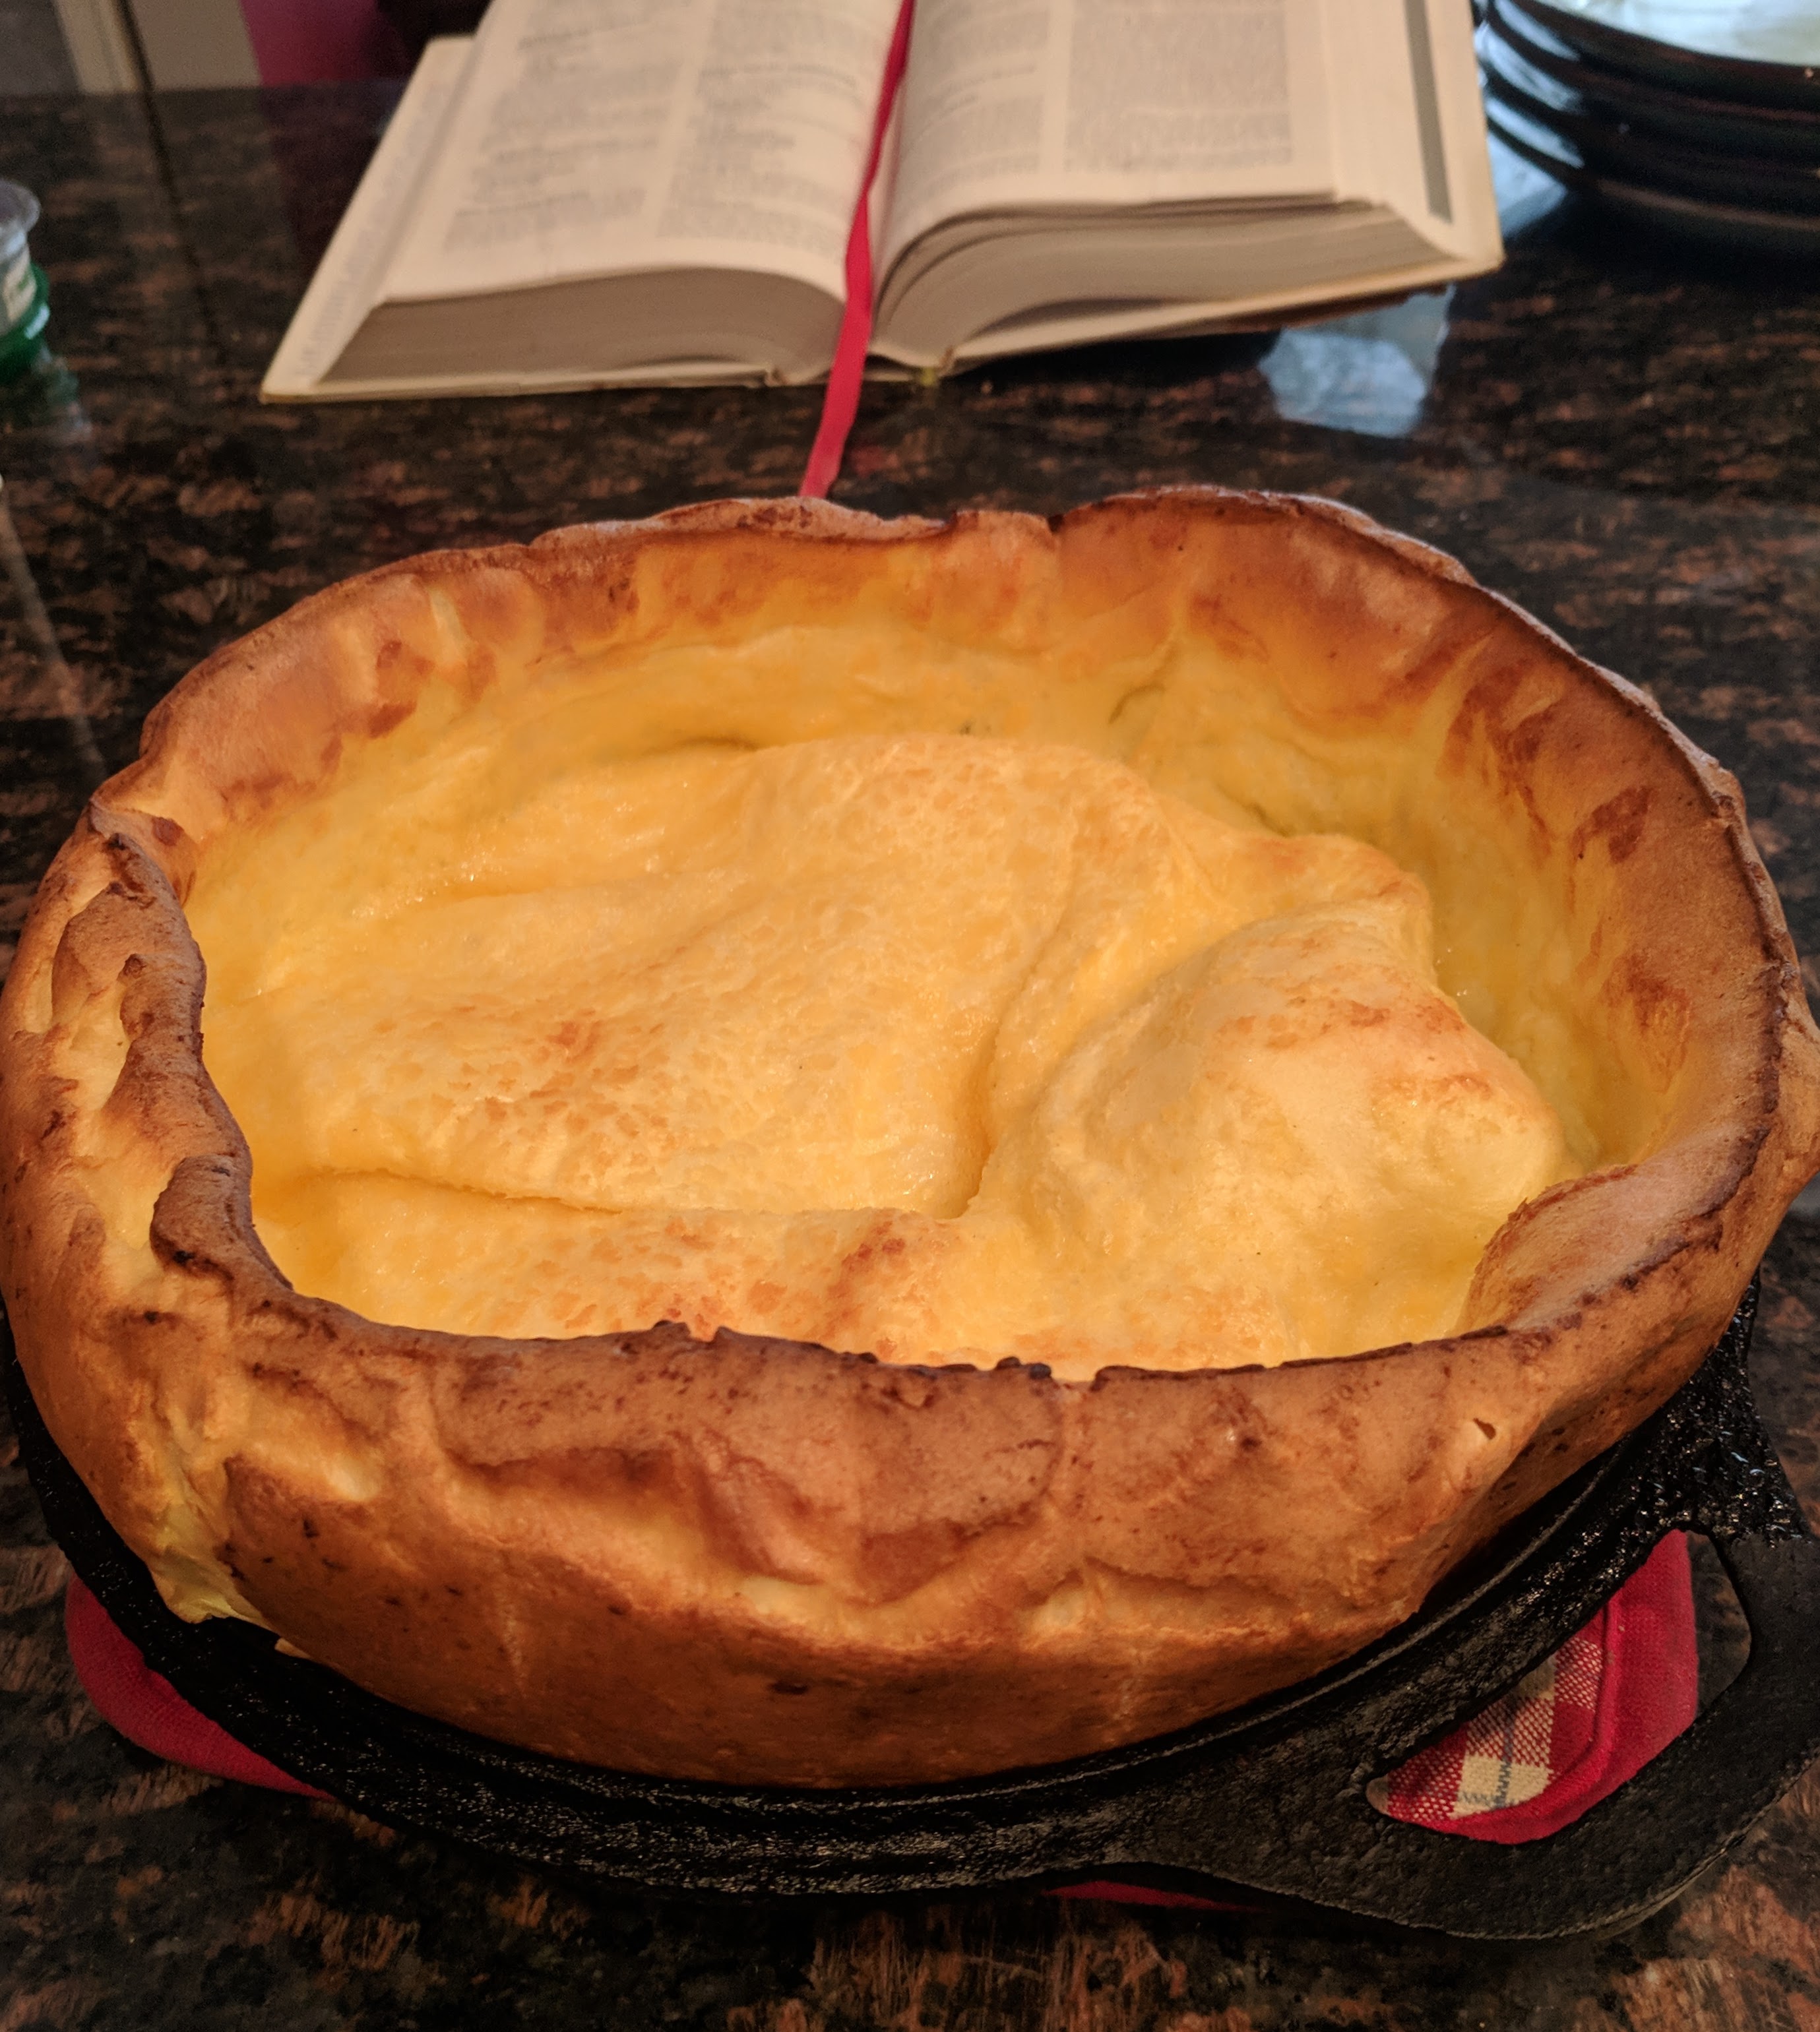
Dutch baby


This is my go-to breakfast for Sunday mornings. It’s made up of six ingredients I always have on hand, and it’s a cinch to whip up. It’s originally from the NYT, but I made a couple alterations.

This pancake emerges from the oven puffed and golden, then deflates into a craggy, tender pancake that’s perfectly accompanied by a dusting of powdered sugar and a generous squeeze of lemon. Other topping suggestions: apricot jam or lemon curd.

Ingredients

  • 3 eggs (room temperature)
  • 1⁄2 cup flour
  • 1⁄2 cup milk (room temperature)
  • 1 tbsp granulated sugar
  • 3 tbsp unsalted butter
  • 1⁄2 tsp almond extract

Instructions

  1. Pull eggs and milk out from fridge; bring ’em to room temperature.
  2. When you’re ready to cook, preheat the oven to 425 degrees.
  3. Combine eggs, flour, sugar, and almond extract. You can mix the ingredients in a blender or by hand with a whisk. Either way, mix until smooth.
  4. Add milk to batter. Mix again until fully incorporated.
  5. Once your oven reaches 425 degrees, put the butter in a heavy 10-inch skillet or baking dish and place it in the oven. As soon as the butter has melted (~2 minutes) add the batter to the pan, return pan to the oven, and bake for 20 minutes, until the pancake is puffed and golden.
  6. Pull the pancake out of the oven. Wonder at its puffed glory. Mourn as it deflates. Cheer again when you realize you get to eat it slathered in a dusting of powdered sugar and lemon juice.

Notes

  • The batter turns out smoother if you let the eggs and milk come to room temperature, but you can go straight from fridge-to-oven if you’re short on time.
  • The original recipe uses nutmeg to flavor the batter; I vastly prefer a splash of almond extract here but any warming spice or extract will work.

No-Knead Sour Dough Bread

Very easy and good!

Ingredients

  • 1 1⁄2 cups sour dough starter (be sure to return 1 cup to starter container)
  • 1⁄2 cup warm milk
  • 1 1⁄2 tsp salt
  • 2 Tbs sugar
  • 2 Tbs cooking oil
  • 1 egg
  • 2 1⁄2 cups flour

Instructions

  1. Let all ingredients come to room temperature.
  2. Mix milk, salt, sugar, and cooking oil together in mixing bowl.
  3. Beat the egg and add to mixture.
  4. Add the sour dough starter and mix well.
  5. Add the flour 1⁄2 cup at a time, mix well.
  6. Cover and set in warm place to proof, at least two hours. It should double in bulk.
  7. Punch down and put into a well-greased loaf pan.
  8. Cover and let rise until about an inch below bottom of pan, about 1 hour 45 minutes, or longer if colder.
  9. Bake in preheated oven at 375 degrees for 45 minutes. It is done when it starts to shrink away from the sides of the pan.
  10. When done, remove from oven, brush top with melted butter. Set on rack to cool.
  11. Very fine, very fine.